
The Ultimate Downsizing Checklist for Seniors - A Simple Room-by-Room Guide
Using a downsizing checklist for seniors can make the entire moving process feel much less overwhelming. After years of living in the same home, sorting through decades of belongings can be emotional and difficult, making it hard to know where to begin.
There are many reasons people decide to downsize. You may be retiring, moving to a smaller home, looking for less maintenance, relocating closer to family, transitioning to an assisted living community, or simply trying to lower living expenses. Whatever your reason, having a plan can make the process much less stressful.

The good news is you don't have to do everything in a single weekend. Breaking the project into smaller tasks allows you to make steady progress without feeling exhausted. Many people complete their downsizing over several weeks or even a few months, and that's perfectly okay.
This room-by-room downsizing checklist for seniors will help you stay organized, make confident decisions, and create a smoother transition to your new home.
If you're just getting started, these Decluttering Tips for Seniors will help you simplify your home before you begin downsizing.
Before You Start Downsizing
A little planning before you begin can save a lot of time and frustration later.
Decide Where You're Moving
Knowing the size and layout of your new home helps you decide what will realistically fit and what you'll no longer need.
Measure Your New Space
Measure rooms, closets, doorways, and large furniture. This prevents moving items that won't fit through the door or into the available space.
Set a Realistic Timeline
Give yourself enough time to sort through everything without feeling rushed. A calendar with weekly goals can help keep you on track.
Create a Downsizing Binder or Notebook
Keep important information in one place, including:
- Moving dates
- Checklists
- Contact information
- Receipts
- Floor plans
- Donation records
Ask Family About Heirlooms
Before donating or selling sentimental items, ask children, grandchildren, or other family members if there are special pieces they'd like to keep.
Gather Moving Supplies
Have plenty of supplies ready before you begin, including:
- Boxes
- Packing tape
- Permanent markers
- Labels
- Bubble wrap
- Packing paper
- Trash bags
Create Four Simple Sorting Categories
One of the easiest ways to stay organized is by using the four-box method.
Keep
Items you use regularly or truly love.
Donate
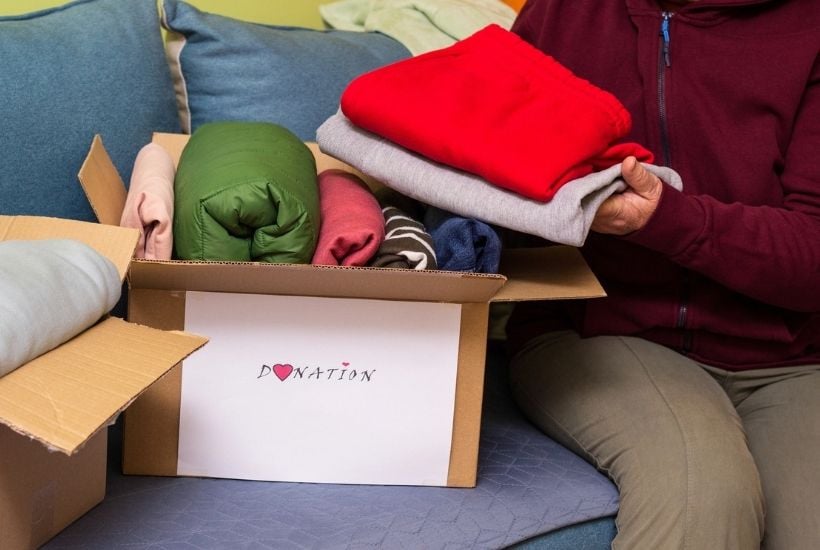
Good-quality items that someone else can use.
Sell
Valuable belongings you no longer need that could help offset moving expenses.
Recycle or Trash
Broken, worn-out, expired, or unusable items.
Unsure (Optional)
If you're having trouble making a decision, place the item in an "Unsure" box and come back to it later with fresh eyes.
The Ultimate Room-by-Room Downsizing Checklist
Living Room Checklist
- Remove duplicate decorations.
- Donate books you don't plan to read again.
- Keep only your favorite family photos on display.
- Reduce extra throw blankets and decorative pillows.
- Decide which furniture fits your new home.
- Organize remote controls, chargers, and electronics.
- Recycle outdated magazines and catalogs.
- Remove decorative items that no longer suit your style.
Kitchen Checklist
- Keep only the dishes you use regularly.
- Reduce duplicate cooking utensils.
- Donate small appliances you rarely use.
- Check pantry and refrigerator expiration dates.
- Keep a reasonable number of mugs.
- Match food storage containers with their lids.
- Reduce duplicate bakeware.
- Organize cooking tools for easy access.
Pantry Checklist
- Donate unopened food where accepted.
- Throw away expired food.
- Reduce duplicate baking ingredients.
- Keep only your favorite serving dishes.
- Organize spices and canned goods.
- Remove cracked storage containers.
Dining Room Checklist
- Keep one or two entertaining dish sets.
- Sort tablecloths, napkins, and placemats.
- Reduce decorative centerpieces.
- Donate unused china cabinets or furniture that won't fit.
- Keep only meaningful display pieces.
Bedroom Checklist
- Donate clothing that no longer fits or isn't worn.
- Reduce duplicate comforters and bedding.
- Organize jewelry and accessories.
- Declutter nightstands.
- Decide whether bedroom furniture fits your new space.
- Remove unused decorative items.
Bathroom Checklist
- Dispose of expired medications following local guidelines.
- Throw away expired toiletries and cosmetics.
- Reduce extra towels.
- Organize first-aid supplies.
- Discard worn bath mats.
- Simplify cleaning supplies.
Linen Closet Checklist
- Keep only the towels you'll realistically use.
- Donate extra blankets and sheets in good condition.
- Throw away stained or worn linens.
- Fold and organize remaining items neatly.
Closets Checklist
- Use the one-year rule for clothing.
- Donate duplicate coats and jackets.
- Reduce shoes you no longer wear.
- Organize scarves, belts, handbags, and accessories.
- Remove empty storage containers you no longer need.
Home Office Checklist
- Shred outdated financial paperwork.
- Organize important documents into labeled folders.
- Scan paperwork when digital copies are appropriate.
- Recycle outdated manuals and old files.
- Dispose of broken office supplies and electronics responsibly.
Garage Checklist
- Donate duplicate tools.
- Dispose of hazardous materials according to local regulations.
- Reduce gardening equipment you no longer use.
- Evaluate seasonal equipment before moving.
- Organize hardware into labeled containers.
Attic or Basement Checklist
- Sort holiday decorations.
- Label keepsake bins clearly.
- Donate forgotten household items.
- Reduce empty storage bins.
- Let go of broken furniture and unused equipment.
- Keep only meaningful memorabilia.
Don't Forget These Important Items
Keep these documents together in a secure, easy-to-access location during your move.
- Financial records
- Wills and estate planning documents
- Insurance policies
- Birth certificates
- Passports
- Social Security documents (or your country's equivalent)
- Medical records
- Emergency contact information
- A secure list of passwords
What to Do With Items You No Longer Need
Once you've decided what isn't coming with you, choose the best way to pass those items along.
- Donate gently used items to local charities.
- Sell furniture, collectibles, or household items online.
- Hold an estate sale if you're downsizing a large home.
- Give sentimental belongings to family members.
- Consign valuable antiques, jewelry, or artwork.
- Recycle items whenever possible.
- Dispose of anything that can't be donated safely and responsibly.
Downsizing Sentimental Items
The emotional side of downsizing is often the hardest part. It's okay to take your time when sorting through meaningful belongings.
Instead of keeping everything, focus on the items that truly bring back happy memories or hold special significance.
If you're ready to let something go but still want to remember it, take a photograph before donating or giving it away.
Memory boxes are another great solution. Reserve one small box for treasured letters, photographs, family keepsakes, or meaningful mementos.
Passing heirlooms to children or grandchildren while you're able to share the stories behind them can make those items even more meaningful.
Remember that your memories aren't stored in your belongings. The people, experiences, and moments you've lived will always be part of you.
Common Downsizing Mistakes to Avoid
Avoid these common mistakes to make the process easier.
- Waiting until the last minute.
- Keeping everything "just in case."
- Buying storage bins before you've decluttered.
- Forgetting to measure furniture.
- Trying to do everything alone when help is available.
- Ignoring the emotional side of downsizing.
- Packing first and sorting later.
- Comparing your progress to someone else's.
Moving Day Checklist
Stay organized by preparing these essentials before moving day.
- Pack an essentials box with daily necessities.
- Label every box clearly.
- Keep medications with you.
- Carry important documents instead of packing them.
- Confirm utilities are connected at your new home.
- Update your address with banks, insurance providers, and other important organizations.
- Arrange transportation for pets if needed.
- Keep phone chargers and emergency contacts easily accessible.
Settling Into Your New Home
Once you've arrived, give yourself time to settle in.
Start by unpacking everyday essentials such as clothing, medications, toiletries, and kitchen basics.
Resist the urge to fill every cabinet and closet right away. Living in the space for a while often makes it easier to decide how you want to organize everything.
If something doesn't fit or you realize you don't need it after all, donate it rather than storing it indefinitely.
Create simple storage systems that are easy to maintain, and arrange frequently used items where they're easy to reach. Prioritize comfort, safety, and accessibility so your new home works well for your daily routine.
Final Thoughts
Downsizing isn't about giving up the things you love. It's about creating a home that better fits the next chapter of your life. By working through one room at a time and focusing on what truly matters, the process becomes much more manageable.
Take your time, celebrate your progress, and remember that every small step moves you closer to a simpler, more comfortable home.
For even easier planning, download the printable version of this downsizing checklist and check off each task as you go.
Related Articles:
- How to Declutter Before Moving
- 60+ Easy Things to Declutter Today to Instantly Refresh Your Home
- How to Organize a Small Space Without Sacrificing Style or Storage

More Decluttering
- 10 Thoughtful Gift Ideas for Seniors Have Everything and Don’t Want More Stuff
- How to Declutter Your Home After the Kids Have Moved Out Without Getting Rid of Every Memory
- How to Simplify Your Home After Retirement
- 30-Day Decluttering Challenge for Seniors: Simple Daily Tasks for a Safer, More Manageable Home



Thank you for this post. Although I’m not ready to move, I am 72 and just began having some health issues. I’m retired and unfortunately, am a bit of a collector and keeper of all the things. sigh. I have 2 children and do not want them to have to go through what I did just a couple of years ago with my own mother. I am trying desperately to downsize my ‘stuff’. My daughters both had only 1 son each, so I know that most of the items handed down to me from MY great grandparents will not be wanted. And I also know that the generation now growing up do not care for past things. (family heirlooms), so I am coming to terms with having to get rid of things. It is just hard.
This post will really help me in getting going faster. Thank you again.
Hi Carol,
Thank you so much for sharing this. I completely understand how difficult it can be to let go of things that hold so many memories. Taking it one step at a time can make the process a little easier. I’m so glad you found the checklist helpful, and I wish you all the best as you work through it.